
How to Install and Secure Your Human Hair Wig: A Step-by-Step Tutorial
Introduction: Why Proper Wig Installation Matters
Installing a human hair wig correctly is crucial for achieving a natural, confident look that lasts. Whether you're new to wigs or looking to perfect your technique, proper installation ensures your wig stays secure, comfortable, and undetectable. For African American women, finding the right installation method can make the difference between a wig that looks obvious and one that seamlessly blends with your natural beauty.
A well-installed wig not only looks more natural but also protects your natural hair underneath and provides the confidence to live your life without worrying about slippage or detection. Let's dive into the complete process of installing and securing your human hair wig.

Essential Preparation Steps
Hair Braiding and Preparation
Before installing your wig, proper preparation of your natural hair is essential:
- Clean and condition: Start with freshly washed and conditioned hair
- Braid down: Create flat cornrows going straight back or in a circular pattern
- Secure edges: Use a light gel or edge control to lay down baby hairs
- Moisturize: Apply a light leave-in conditioner to prevent dryness

Wig Cap Application
A wig cap creates a smooth base and protects your natural hair:
- Choose a cap that matches your skin tone
- Ensure the cap covers all your natural hair completely
- Secure with bobby pins if needed
Different Installation Methods
1. Adhesive Glue Method
Best for: Long-term wear (2-4 weeks)
Process:
- Apply thin layer of wig glue around hairline
- Wait for glue to become tacky (about 30 seconds)
- Press wig firmly into place
- Hold for 10-15 seconds per section
2. Wig Tape Method
Best for: Medium-term wear (1-2 weeks)
Process:
- Cut tape to fit hairline sections
- Remove backing and apply to clean skin
- Press wig lace onto tape
- Trim excess lace carefully
3. Wig Grip Method
Best for: Daily wear and beginners
Process:
- Place wig grip around hairline
- Adjust for comfortable fit
- Place wig over grip
- Secure with clips if needed
4. Sew-In Method
Best for: Long-term protective styling
Process:
- Create a base with cornrows
- Sew wig tracks to braided base
- Leave out perimeter for blending
- Style to blend seamlessly
Step-by-Step Installation Tutorial
Step 1: Prepare Your Workspace
Set up in good lighting with a large mirror. Gather all tools: wig, adhesive, scissors, rat-tail comb, and styling products.
Step 2: Position the Wig
Place the wig on your head without adhesive first. Mark where the hairline should sit - typically 1-2 fingers above your eyebrows.
Step 3: Trim the Lace
Cut the lace as close to the hairline as possible without cutting the hair. Use small, precise cuts for the most natural look.
Step 4: Apply Your Chosen Method
Whether using glue, tape, or grip, work in small sections for the most secure hold. Start at the center and work outward.
Step 5: Blend and Style
Use concealer or foundation to blend the lace with your skin tone. Style the baby hairs to frame your face naturally.

Tips for Natural-Looking Installation
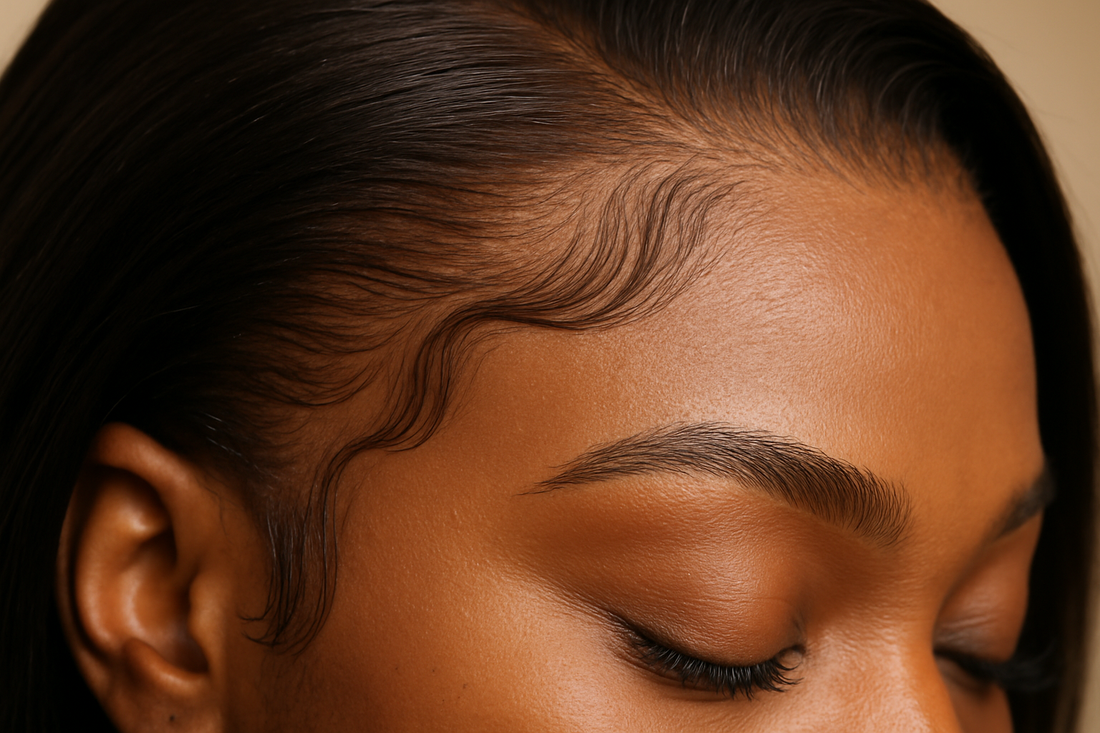
Hairline Perfection
- Pluck the hairline to create natural irregularity
- Avoid straight, uniform lines
- Create baby hairs for authenticity
- Use makeup to blend lace with skin
Color Matching
- Choose lace that matches your skin undertone
- Consider seasonal skin tone changes
- Test in natural lighting before final installation
Securing for Active Lifestyles
For Exercise and Sports
- Use stronger adhesives for high-activity days
- Consider a wig grip for extra security
- Apply setting spray to edges
- Use a silk scarf during workouts
For Swimming
- Use waterproof adhesives
- Apply extra tape around the perimeter
- Consider a swim cap for protection
- Rinse and condition immediately after
For Windy Weather
- Secure with additional clips
- Use edge control for flyaways
- Consider protective styling
- Carry touch-up products
Maintenance and Care
Daily Care
- Sleep with a silk or satin scarf
- Use gentle, sulfate-free products
- Avoid excessive heat styling
- Brush gently from ends to roots
Weekly Maintenance
- Deep condition the wig
- Check and reinforce adhesive areas
- Clean the hairline area
- Moisturize your natural hair underneath
Troubleshooting Common Issues
Lifting at the Edges
- Clean the area and reapply adhesive
- Use a stronger hold product
- Consider professional touch-up
Visible Lace
- Apply foundation or concealer
- Use a stippling motion to blend
- Set with translucent powder
Uncomfortable Fit
- Adjust wig cap size
- Use cushioning strips
- Consider professional fitting


Conclusion and Product Recommendations
Mastering wig installation takes practice, but with the right techniques and products, you can achieve a flawless, natural look that boosts your confidence. Remember that everyone's head shape and lifestyle needs are different, so don't be afraid to experiment with different methods to find what works best for you.
For the best results, invest in quality human hair wigs that match your texture and color preferences. High-quality wigs not only look more natural but also last longer and style more easily.
Essential Products for Success:
- Premium human hair wigs with HD lace
- Professional wig adhesives and tapes
- Wig grips for comfortable daily wear
- Specialized wig care products
- Professional installation tools
Whether you're protecting your natural hair, experimenting with new styles, or dealing with hair loss, a properly installed human hair wig can be a game-changer. Take your time with the installation process, and don't hesitate to seek professional help if you're unsure about any step.
Remember, confidence is your best accessory. When your wig looks and feels natural, you'll forget you're even wearing one – and so will everyone else.